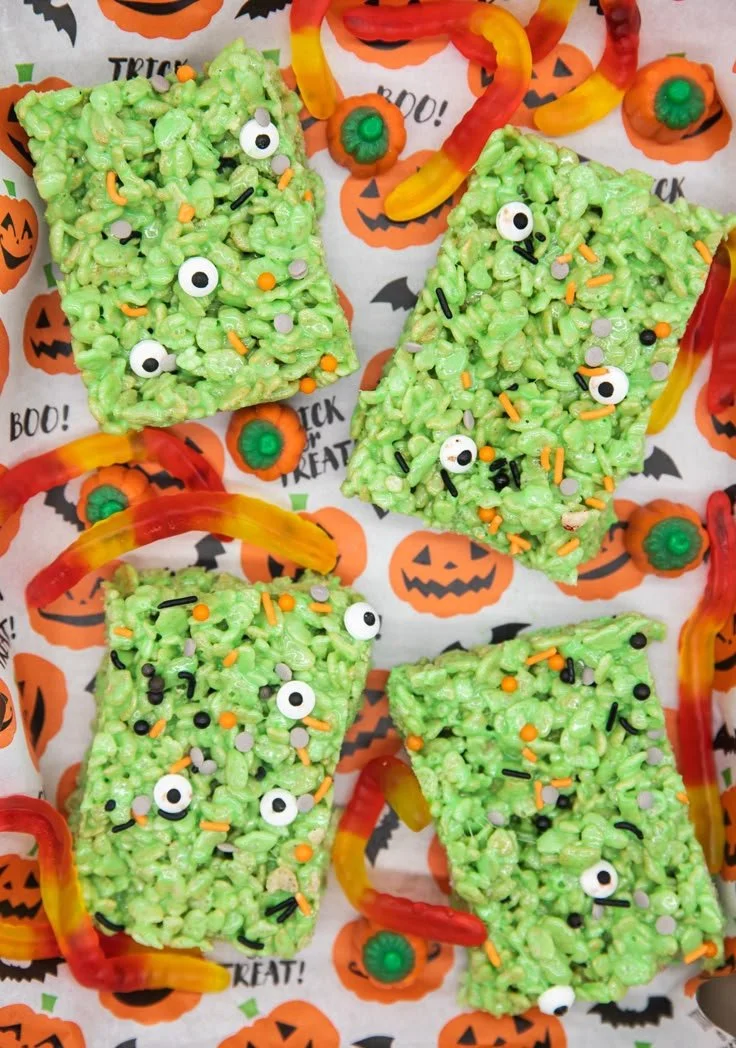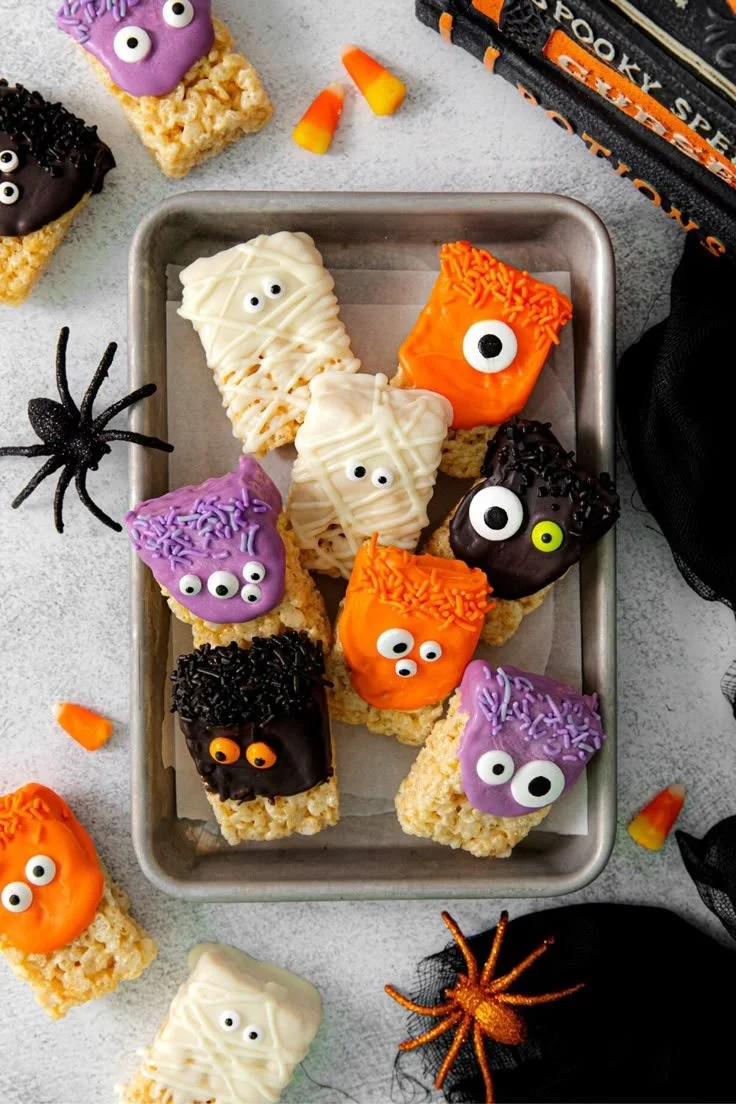
Halloween is an enchanting time for families, and what better way to celebrate than with these fun and festive Halloween Rice Krispie Treats! These playful treats are both a delicious snack and an interactive activity for kids and adults alike. With their colorful decorations and cheerful shapes, they are perfect for Halloween parties, school events, or as a delightful family treat.
Why You’ll Love Halloween Rice Krispie Treats
- Easy to Make: This recipe is straightforward, making it ideal for beginners who want to create something special without a lot of fuss.
- Customizable Decorations: You can let your creativity shine by customizing the shapes and decorations. Use different colored candy melts and sprinkles to match your Halloween theme!
- Fun for All Ages: These treats are not only tasty but also provide a fun opportunity for kids to help in the kitchen, making it a great family bonding activity.
- Perfect for Parties: Halloween Rice Krispie Treats are a hit at any gathering, boasting an eye-catching presentation that entices both kids and adults.
- Make Ahead: These treats can be prepared in advance, allowing you to focus on other party preparations as Halloween approaches.
Recipe Overview
- Prep Time: 30 minutes
- Cook Time: 15 minutes
- Total Time: 45 minutes
- Servings: 24 treats
- Difficulty Level: Easy
Ingredients You’ll Need for Halloween Rice Krispie Treats
- 1 (10-ounce) bag Ghirardelli white vanilla-flavored melting wafers
- 3 (12-ounce) bags Wilton Candy Melts (orange, purple, and black)
- 3 teaspoons vegetable shortening, divided
- 1 box (24-pack) Rice Krispies Treats (prepared)
- 60 assorted candy eyeballs (large and small, in white and Halloween colors)
- Jimmy sprinkles – orange, purple, and black
- Parchment paper
- 2 large baking trays
- 1 piping bag (for mummy bandages) or zip-top bag
- Decorating tip #3 (optional)
- Cooking tweezers (optional)

Ingredient Notes
- Melting Wafers: These create a smooth coating for your treats. You can substitute with other brands of melting chocolate if preferred.
- Candy Melts: Choose colors based on your desired spooky theme. Feel free to mix up colors for fun variations.
- Rice Krispies Treats: Using store-bought treats saves time and simplifies the process. You could make your own if you prefer.
How to Make Halloween Rice Krispie Treats
-
Prepare Your Workspace
Line your baking trays with parchment paper. This will make transferring the treats easier later. -
Melt the Chocolate
In a microwave-safe bowl, combine the Ghirardelli white melting wafers with 1 teaspoon of vegetable shortening. Heat in 30-second intervals, stirring in between, until fully melted and smooth. -
Coat the Treats
Take the prepared Rice Krispies Treats and immerse them in the melted chocolate, ensuring even coating on all sides. Use a fork to lift them out, allowing excess chocolate to drip back into the bowl. -
Decorate with Candy Melts
Melt the desired color of Wilton Candy Melts (orange, purple, or black), each mixed with 1 teaspoon of shortening, using the same method as before. Drizzle the melted colors diagonally over the coated treats to create festive designs. -
Add Eyeballs and Sprinkles
Immediately before the chocolate sets, place candy eyeballs on top and sprinkle over colorful jimmies for an extra fun touch. -
Let Set
Allow the treats to sit at room temperature until the chocolate hardens, which should take about 15-30 minutes. -
Optional Mummy Treats
For mummy-themed treats, use the piping bag (or a zip-top bag with a corner snipped off) filled with white melted chocolate to create “bandages” on one side of the treat. Add eyeballs on top of the white bands before it sets. -
Serve and Enjoy!
Once fully set, remove the treats from the parchment paper, slice into squares or keep them whole, and enjoy!
Tips for Success
- Timing: Work quickly after melting chocolate, as it starts to set fast.
- Helpful Tools: Use cooking tweezers to place eyeballs for precision.
- Room Temperature: Ensure your kitchen is cool to prevent chocolate from melting too quickly.
- Double Coat: If you want a thicker chocolate layer, feel free to double dip your treats after the first coat has set.
Easy Variations
- Pumpkin Faces: Instead of standard decorations, shape the Rice Krispies into pumpkins and use orange chocolate with green stems made from chocolate.
- Ghostly Treats: Shape the treats into ghost forms and use white melted chocolate with chocolate chips for eyes.
- Cereal Mix-Ins: Fold in some crunchy cereal or candy pieces into the Rice Krispies mixture for added texture before shaping.
- Flavor Twist: You can add a few drops of extract (like vanilla or almond) to the melted chocolate for a flavor boost.
What to Serve with Halloween Rice Krispie Treats
- Hot Apple Cider: The warm spices in apple cider complement the sweetness of the treats.
- Chocolate Milk: A nostalgic pairing, chocolate milk balances the rice krispie sweetness perfectly.
- Caramel Sauce: Provide a side of warm caramel for dipping; it adds an extra layer of flavor.
- Fruit Skewers: Lighten things up with some festive fruit skewers, offering a refreshing contrast.
Storage and Reheating
- Refrigerator Storage: Store in an airtight container for up to one week.
- Freezer Storage: For longer storage, freeze the treats for up to three months. Place parchment paper between layers to prevent sticking.
- Best Method to Preserve Texture: Allow to come to room temperature before eating to enjoy their original texture.
- Meal Prep Note: These are great for making ahead, just store them safely until it’s time to serve.
Common Mistakes to Avoid
- Overheating Chocolate: Melt chocolate in small intervals to avoid burning.
- Skipping the Shortening: Forgetting to add shortening can lead to the chocolate being too thick for smooth coating.
- Not Allowing Chocolate to Set: Be patient and let each layer of chocolate set before adding the next for clean designs.
- Using Shiny Pans: Avoid using shiny pans to prevent sticking; parchment paper works best for easy lifting.
Halloween Rice Krispie Treats: Background & Cultural Inspiration
Halloween traditions have evolved over the centuries, combining various cultural practices to create a fun community event. Celebrated largely in Western cultures, Halloween encourages creativity with costumes and treats. Rice Krispie Treats, developed in the 1930s, bring a nostalgic homemade feel to modern Halloween celebrations. They can be transformed into playful designs, making them a perfect vehicle for festive fun. The combination of crunchy and chewy textures resonates well with both children and adults, ensuring that these treats remain a family favorite during the spooky season.
Frequently Asked Questions
How do I make Rice Krispie Treats from scratch?
To make them from scratch, melt 4 tablespoons of butter in a pot, add a 10-ounce bag of marshmallows until melted, then combine with 6 cups of Rice Krispies. Spoon into a greased pan and let set.
Can I use different candies for decorations?
Absolutely! Feel free to substitute with your favorite Halloween candies or chocolates that fit the theme.
Are these treats gluten-free?
Yes! As long as your Rice Krispies brand is gluten-free, these treats are a suitable option.
Can I make these treats ahead of time?
Yes, you can prepare them a few days ahead. Just store them in an airtight container at room temperature.
What can I do with leftovers?
Leftover treats make a delicious snack. You can also chop them up and mix into ice cream for a fun dessert!
Final Thoughts
There’s something magical about creating spooky, colorful Halloween Rice Krispie Treats that everyone enjoys. Their easy preparation and delightful appearance make them a must-try for the Halloween season. Whether for a party or enjoying a family night in, these treats bring a festive touch to your table. So gather your ingredients, get the kids involved, and start making sweet memories this Halloween!
PrintHalloween Rice Krispie Treats
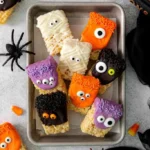
Delicious and colorful Halloween Rice Krispie Treats that are fun to make and perfect for parties.
- Prep Time: 30 minutes
- Cook Time: 15 minutes
- Total Time: 45 minutes
- Yield: 24 treats
- Category: Dessert
- Method: No-Bake
- Cuisine: American
- Diet: Vegetarian
Ingredients
- 1 (10-ounce) bag Ghirardelli white vanilla-flavored melting wafers
- 3 (12-ounce) bags Wilton Candy Melts (orange, purple, and black)
- 3 teaspoons vegetable shortening, divided
- 1 box (24-pack) Rice Krispies Treats (prepared)
- 60 assorted candy eyeballs (large and small, in white and Halloween colors)
- Jimmy sprinkles – orange, purple, and black
- Parchment paper
- 2 large baking trays
- 1 piping bag (for mummy bandages) or zip-top bag
- Decorating tip #3 (optional)
- Cooking tweezers (optional)
Instructions
- Prepare your workspace by lining your baking trays with parchment paper.
- Melt the Ghirardelli white melting wafers in a microwave-safe bowl with 1 teaspoon of vegetable shortening.
- Coat the prepared Rice Krispies Treats with the melted chocolate.
- Decorate with melted Wilton Candy Melts drizzled diagonally over the treats.
- Add candy eyeballs on top and sprinkle with jimmies.
- Let the treats sit at room temperature until the chocolate hardens.
- Optional: For mummy treats, use a piping bag to create “bandages” with white chocolate.
- Serve and enjoy your festive treats!
Notes
Work quickly after melting chocolate, as it starts to set fast. Use cooking tweezers for precision in placing eyeballs.