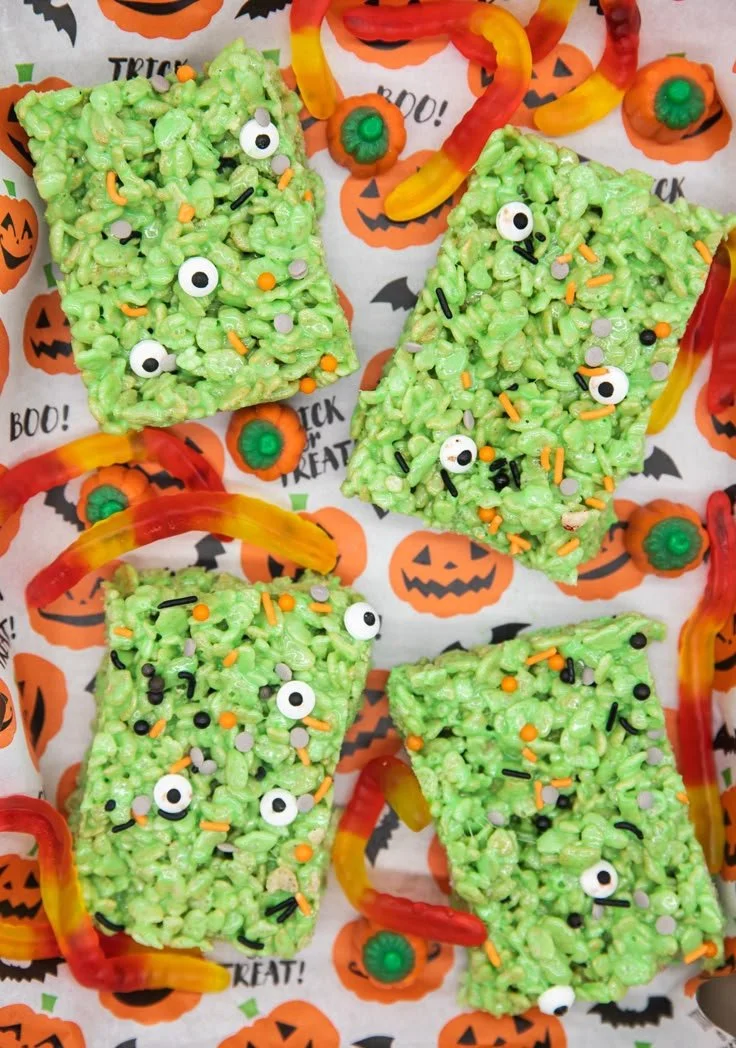
Halloween Oreo Rice Krispie Treats are a fun and festive twist on the classic treat, perfect for celebrating the spooky season. These colorful, crunchy goodies combine the beloved flavors of Rice Krispies and Oreos, making them a hit for both kids and adults. With simple ingredients and easy steps, this recipe is sure to become a favorite at your Halloween gatherings.
Why You’ll Love Halloween Oreo Rice Krispie Treats
- Easy to Make: With just a few ingredients and simple steps, these treats come together quickly, making them perfect for last-minute parties or school functions.
- Fun for Kids: Involving little ones in the kitchen is a great way to bond, and the fun colors and shapes make this treat appealing for all ages.
- No Baking Required: Unlike many traditional desserts, these treats require no baking, making them a hassle-free option for busy cooks.
- Perfect for Halloween Parties: The festive look and flavors celebrate the season and make them a standout at any Halloween gathering—ideal for sharing!
- Customizable and Versatile: You can easily modify the recipe with your favorite mix-ins or toppings, allowing for a variety of flavors and presentations.
Recipe Overview
- Prep Time: 10 minutes
- Cook Time: 10 minutes
- Total Time: 20 minutes
- Servings: 16
- Difficulty Level: Easy
Ingredients You’ll Need for Halloween Oreo Rice Krispie Treats
- 4 tablespoons butter
- 6 cups small marshmallows
- 4 cups Rice Krispies cereal
- 20 Halloween Oreos, roughly crushed
Notes:
- The butter provides richness and helps bind the ingredients together.
- You can substitute with any variety of Oreos for different flavors.
- Feel free to mix in festive sprinkles or colored chocolate to enhance the spooky theme.

How to Make Halloween Oreo Rice Krispie Treats
-
Crush the Oreos
Place the Halloween Oreos in a large Ziploc bag and use a rolling pin or your hands to crush them into small pieces. Set aside. -
Melt Butter and Marshmallows
In a large saucepan over medium heat, melt the butter. Once melted, add the marshmallows and stir frequently until completely melted and smooth. -
Combine Ingredients
Remove the saucepan from heat. Add the Rice Krispies and crushed Oreos to the melted marshmallow mixture. Use a spatula to gently fold and combine until everything is well coated. -
Press into Pan
Butter a 9×13 inch baking dish. Pour the mixture into the dish and press it down evenly using buttered hands or a spatula, ensuring it’s compact. -
Cool and Slice
Allow the treats to cool completely at room temperature. Once cooled, cut them into squares and serve.
Tips for Success
- Use Fresh Ingredients: Ensure your marshmallows and Oreos are fresh for the best flavor and texture.
- Don’t Overheat the Marshmallows: Remove the pan from heat as soon as the marshmallows have melted to avoid a hard, chewy texture.
- Press Evenly: When spreading the mixture into the pan, press evenly to ensure uniform thickness, which helps them hold together.
- Store Properly: Keep any leftovers in an airtight container to maintain freshness.
Easy Variations
- Chocolate Drizzle: Drizzle melted chocolate over the top after cooling for extra sweetness and visual appeal.
- Add Nuts: Mix in chopped nuts, like pecans or almonds, for a crunchy twist.
- Themed Colors: Use colored marshmallows or add food coloring to the melted marshmallow mixture to match your Halloween theme.
What to Serve with Halloween Oreo Rice Krispie Treats
- Hot Chocolate: A warm mug of hot chocolate complements the sweetness of these treats perfectly.
- Gummy Worms: Add gummy worms on top for a spooky touch that kids will love.
- Cupcakes: Serve with Halloween-themed cupcakes for a complete dessert spread.
- Fruit Bats: Offer some fresh fruit, like bat-shaped apple slices, to balance out the sweetness.
Storage and Reheating
- Refrigerator Storage: Store leftover treats in an airtight container at room temperature for up to 3 days.
- Freezer Storage: These treats can be frozen for up to a month. Wrap them tightly in plastic wrap and place them in a freezer-safe bag.
- Reheating Method: If they become a bit hard, microwave a few squares for 5-10 seconds to soften them slightly.
- Meal Prep Note: Consider making these a day ahead of a festive event for easier serving.
Common Mistakes to Avoid
- Burning the Marshmallows: Keep a close eye on the marshmallows while melting—remove them from the heat as soon as they’re melted.
- Not Pressing Firmly: If the mixture is not pressed down firmly, the treats may crumble when cut.
- Using the Wrong Pan Size: Doubling the recipe? Ensure you are using a larger pan, or the bars will not set correctly.
Halloween Oreo Rice Krispie Treats: Background & Cultural Inspiration
Rice Krispie Treats originated in the 1930s, initially popularized by the Rice Krispies cereal brand. Over the years, these simple treats have evolved into countless variations, reflecting seasonal themes. The addition of Oreos and Halloween-inspired shapes highlights how versatile and adaptable this classic dessert can be, making it a staple at festive celebrations in both households and parties. Incorporating seasonal flavors creates a connection between nostalgia and current trends, appealing to generations of both children and adults during Halloween.
Frequently Asked Questions
Can I make these treats in advance?
Yes, you can prepare them a day ahead of time. Just store them properly to maintain their freshness.
What type of marshmallows should I use?
Small marshmallows are preferable for this recipe as they melt quickly and evenly.
Can I substitute Rice Krispies with another cereal?
Yes, you can use any crispy cereal or even gluten-free varieties to accommodate dietary preferences.
How long do these treats last?
When stored properly, they will stay fresh for up to 3 days at room temperature and can be frozen for about a month.
Are there any allergy-friendly substitutes?
You can use dairy-free butter, vegan marshmallows, and gluten-free cereals to make these treats suitable for various dietary needs.
Final Thoughts
Halloween Oreo Rice Krispie Treats offer a simple, fun way to celebrate the spooky season with a deliciously crunchy treat. Their ease of preparation and customizable nature make them a great choice for gatherings, ensuring everyone will enjoy them. So gather your ingredients and get ready to create this delightful dessert—it’s sure to bring smiles and sweetness to your Halloween celebrations!
PrintHalloween Oreo Rice Krispie Treats

A fun and festive twist on the classic Rice Krispie treat, combining Oreos for a delicious Halloween treat.
- Prep Time: 10 minutes
- Cook Time: 10 minutes
- Total Time: 20 minutes
- Yield: 16 servings
- Category: Dessert
- Method: No Bake
- Cuisine: American
- Diet: Vegetarian
Ingredients
- 4 tablespoons butter
- 6 cups small marshmallows
- 4 cups Rice Krispies cereal
- 20 Halloween Oreos, roughly crushed
Instructions
- Crush the Oreos by placing them in a large Ziploc bag and using a rolling pin or your hands to crush into small pieces. Set aside.
- Melt the butter in a large saucepan over medium heat. Once melted, add the marshmallows and stir frequently until completely melted and smooth.
- Remove the saucepan from heat. Add the Rice Krispies and crushed Oreos to the melted marshmallow mixture, and use a spatula to gently fold and combine until well coated.
- Butter a 9×13 inch baking dish. Pour the mixture into the dish and press it down evenly using buttered hands or a spatula.
- Cool the treats completely at room temperature. Once cooled, cut them into squares and serve.
Notes
Use fresh ingredients for the best flavor and texture. Don’t overheat the marshmallows to avoid a hard texture. Store leftovers in an airtight container.